Pages

Monday, October 12, 2015

Holiday Penguin

Follow my blog with Bloglovin

 Good Monday Morning!

Today I’m posting my first Christmas card of the season. I 
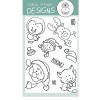
am using the adorable Peeking Friends stamp set from Gerda Steiner Designs. This is the same stamp set I used for the Fox card I made last week. Both images were water colored on Strathmore Hot Press watercolor paper.

I colored the penguin using Distress Inks and the No Line Coloring Method which I seem to be addicted to lately. My other addiction is 
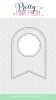
shaker cards and for this one I used the Stitched Banner Duo 2 die from Pretty Pink Posh. I filled it with a bunch of confetti, seed beads and of course Pretty Pink Posh sequins that I mixed together myself.

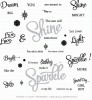
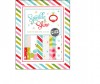
I kept everything in a red and white theme to match this fun background paper from Papertrey Ink Sparkle & Shine Paper Collection. I used the matching stamp set to add the star bursts to the tag.

The greeting is from a set called Merry Greetings from Mama Elephant. How cool is that font?  Add a black Chevron ribbon, a couple of rhinestones, some Wink of Stella Clear and tada… A penguin holiday card fit for anyone on your holiday list. And if you did it in a different color scheme and popped a different hat on the penguin it could be a card for just about any occasion.

I am starting to figure out how to link you to the products I mention. They are located at the bottom of the post. I don't have any affiliates set up yet but will inform you if I do.

Oh, and hopefully it won’t be long until I start making videos. So if you want to know when that happens please subscribe to my blog.

I would love to hear how you like the blog so far. Please leave a comment if you have any suggestions or just want to say hi!


Friday, October 9, 2015

Transparent Ghosties - Booyah

Hey There!

Today’s card was a struggle but in the end I absolutely love the card. I hope you do t

I started 3 or 4 cards over the last week using Lawn Fawn’s Booyah stamp set. It is so cute. But I didn’t finish any of them. Each day I’d end up setting the stamps aside and moving on to something else. Then last night it hit me. Ghosts should be transparent. I wanted to make my little spooks so the background color would show through them, but I didn’t want to use vellum. So I started playing. I tried multiple things and several products for both the background and the ghostly image.


Here is what worked for me:

I created the watercolor background using Distress Ink on Strathmore watercolor paper. I stamped the images using Stampin Up Whisper White Craft Ink. Blended it out using a water brush. I wanted the light source to be from the center top so I attempted to give that impression based on how much white I placed. I then mixed up some Kuretake Gansai Tambi watercolor in Silver #95 with some Perfect Pearls and applied that sparingly. Once dry I added their personality via a cute little face. I used white gel pens to tidy it up a bit. I used Signo on the faces because it is more opaque and Gelly Roll for accents around the edge because it is more transparent and has smaller tip. I also want to mention the sequins and the awesome green ribbon is from Pretty Pink Posh.  I really like how they turned out.


I used a ton of supplies on this card. Until I can get a link program set up it is just too time consuming for me to list them all. If you have any questions please leave a comment. Hopefully I can get the linking stuff set up this weekend.


Thursday, October 8, 2015

Frankenstein Fun

Hi everybody!

Today’s card is a fun one. Every year I get Halloween stamps and then never find the time to make cards with them. When I saw this little Frankenstein from The Alley Way Stamps I had to fit it in.


So Frankie is done in the No Line Watercolor style using Distress Inks. I had a bit of trouble getting those tiny little fingers to look right. But now I think he looks like he is dancing.  Isn’t he cute?

I created the lines on his pants by gently scraping the watercolor paper (Strathmore hot press) with the sharp tip of my Pick-Me-Up tool. Then added another wash of color and it collects in the lines. So much easier than trying to paint them on.

I may try to locate some challenges to enter him into. If you have any ideas please leave me a comment.

All of the stamps are from the ghoul-friend set from TheAlley Way Stamps.
The shaker bits are from Lucy’s Cards. I love the little ghosties in the mix.
A little black Wink of Stella to accentuate his spikey hair. And Sakura Black Glaze Pen on his beady little eyeballs.
All cardstock is from Simon Says Stamp. Designer paper is from my old stash.

I'm working on getting proper product linking set up. And fine tuning the blog and my social media stuff.


Tuesday, October 6, 2015

No Line Coloring Fall Fox

Since this is my first blog post and I have no idea what I'm doing I will be very surprised if anyone besides me and maybe my friend Jenny will actually see this post. But here is to new adventures!

I created a card I would like to share. I'm not sure if I'll figure out how to link products or do anything except type. Now to upload the picture...


Woo Hoo, I did it. Ok, now for the deets.

This was my first attempt at no line watercoloring using distress inks. I loved how it turned out. Here is a close up of the fox:


The adorable fox stamp is from a set by Gerda Steiner called Peeking Friends.
The acorn and leaves are from a set by Sugar Pea Designs called Nuts About You.
The dies are various dies from Lawn Fawn and the awesome Storybook 1 die from Pretty Pink Posh.

Well, that's it. My very first post. If I like blogging I will improve the appearance and hopefully make it a place you want to visit again.

If anyone who reads this has a recommendation for someone who can make this blog look snazzy on a budget please leave me a comment.

Thanks for visiting.