Hi Everyone!
I figured everyone has received my Christmas card by now so I could put this up without ruining the surprise. I sent them out late because they took longer than I thought. Which is always the case isn't it? This is a very long post because I detail exactly what I did. But for your convenience I categorized things so you could just read what you wanted.
Drumroll Please! TaDa
The card is on
Tim Holtz Distress Watercolor card stock.
Stamping
I stamped snowflakes from several different stamp sets using
VersaMark Ink and white embossed them.
- Snowflakes - I used Lots of Snowflakes from Simon Says Stamp, Snowflakes by Lia from Hero Arts, and Bring on the Snowflakes and Snowy Sayings from a Catherine Pooler kit. I think they were made by Casual Fridays but they are not currently available unless you purchased Catherine's Stamp of Approval Winter Kit. They should be released sometime this year by Casual Fridays.
- Sentiments - The Magical Holiday sentiment on the front of the card is from the Snowy Sayings set I mentioned above.
- Embossing Powder - Hero Arts White Embossing Powder.
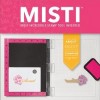
I set all of the stamps up on my
MISTI at once so I could just stamp the whole front. Because it is water color card stock I stamped everything twice. Besides the slight texture watercolor card stock is thirsty by nature. I found stamping them twice gave a much smoother embossed image. It seems like all stamps aren't the exact same depth because some I had to make sure to push on individually or they would only partially stamp. Seriously, I could not live without my MISTI and if you haven't heard yet, they are coming out with a
Mini MISTI that won't take up as much table space but still fits an A2 card with a little extra room. I've linked to both Simon Says Stamp and My Sweet Petunia so you can compare pricing and because the Mini MISTI is a pre-order and not on Simon's site at this time.
Background
Next I created the background using several of Distress Ink in
Tumbled Glass,
Broken China and my favorite Distress color,
Salty Ocean. But I wasn't quite getting the dark contrast I wanted. So I experimented with my other ink brands and found that Stampin Up's
Pacific Point is the exact same hue as Salty Ocean but just a little deeper. So I also used that.
NOTE - A dear friend of mine, Jennifer Kay is a Stampin Up demonstrator and I linked to the item in her store. If you already have a demonstrator just go to www.stampinup.com and login to your account.
- I just pressed the Distress inks on my Tim Holtz craft mat, laying the colors approximately where I wanted them. Dipped, wiggled and picked up the card making sure the area I wanted lightest was lifted first. That way the darker inks would drip away rather than flooding my light area and ruining the effect I wanted. I dried the background with a heat gun.
- I pounced and dried a few times to get some dots and texture.
- I then reapplied the inks and added the Pacific Point ink in specific areas sparingly. I wanted it behind the words so they would show up nicely, but I also wanted to balance out the layout. I continued the pounce and dry until I was happy. There are 4 to 6 layers and in person it has great depth.
- Next I used a partially dry baby wipe to wipe the remaining ink off of the snowflakes and sentiment. Then came the famous Tim Holtz spritz and flick technique. You spray water in your hand and them flick your fingers at the paper, leave it a minute and them blot it off and do it again until you like the texture.
- And finally I spritzed the whole thing with Tsukineko Sheer Shimmer Spritz which I love. It is extremely fine and gives a soft shimmer.
Die Cutting
All of the silver elements are die cut from
My Favorite Things Silver Shine Card Stock. It's my favorite silver paper so far.
- Watercolor Paper - I used Simon Says Stamps Stitched Rectangles for the watercolor paper. These dies are cool because you get a stitched line on both sides of the cut line which allows you to make cool frames. The rest of the layers I cut on my paper trimmer.
- Slope - For the stitched slope I used one of the slopes from Mama Elephant's Landscape Trio set. It only cuts on one side of the paper so I die cut the first one and then just kept placing the cut line just below the stitches on the previous one which cut it off. I placed a piece of copy paper over them so they didn't get too many marks on it from my cutting mat. I tried cutting them by hand but just couldn't get them perfect. And you know they have to be as perfect as possible or it bothers me.
- Santa in Sleigh - This is a Stampin Up die from the Sleigh Ride Edgelits (it is no longer available). The sleigh actually sat on a sloping die but it wasn't stitched and it didn't fit my sentiment as nicely as the Mama Elephant one. So I cut it off it's slope and glued it on mine.
- Snowflakes - Lawn Fawn Mini Snowflakes. I love the variety of sizes. Even the little stars are from this set.
Embellishments
- Stars & Snowflake - As mentioned above the stars were die cut using Lawn Fawn Mini Snowflakes.
- Enamel Dot - The dot on the snowflake are another favorite of mine, Doodlebug Glitter Sprinkles. I didn't have enough of the blue Sprinkles so on some I used Lily White which was also very pretty.
Assembly
Inside of Card - I usually don't do anything fancy on the inside of the card but I had this slice of the watercolor background left from cutting it down and thought I would use it.
The back just had a little "Hand Stamped by" stamp and I signed my name. On the envelop I stamped a cluster of snowflakes by the address label.
Tips - Here are some things I learned from making this project.
- Dies and stamps from different manufacturers are not the same depth. I did a whole bunch of die cutting with all of the dies on the silver card stock at once only to have to repeat this separating the dies by set because each time some of them didn't cut through all the way but others were cut clean through.
- When die cutting with a foil type card stock make your sandwich the minimum it needs to cut all the way through. If you shim it then the little circles on the die that are used to poke out the paper to release it, make an impression and it is difficult to remove them without dulling the shine of the paper or leaving marks. Lightly pressing with my Teflon Bone Folder helped. But even this will change the surface of this type of paper if you don't take care.
- When possible use Tombow Mono Multi glue to adhere layers so you have a minute to move it around. When I used Score Tape, I also added Tombow to it. I keep the score tape on one corner (usually top left) and that is where I can hold it down for aligning. In the middle I remove the tape completely. But on the edges I only pull back about an inch and them fold it over so it is sticking off the edge of layer. When I set the card down it is floating on the Tombow so I can move it around some. When it is where I want it I push down on the center area where there is Score Tape. Now I just have to slowly pull off the tabs hanging out from the Score Tape that was around the outside. All the while I am anchored in 2 places. The center because of the Score Tape. And the top left corner because I am holding it. The glue is in the center so it never squirts out.
- When adhering die cuts I often set an acrylic block on top to hold it down for a minute. But even Multi Matte Medium will make a mess on metallic cardstock. It dulls it. If you try to erase it you make a bigger mess. There are 2 issues here.
- How did the adhesive get on the top of the embellishment?
I found it was getting on the top of my embellishments not from my hands, (I actually wore a glove so no oil would mess up the silver paper.) but from my acrylic block. Once I set it on one, a small amount of glue would seep out and them I'd move the block to another card and it would just place small amounts of glue down. This drove me nuts before I figured it out. DUH!
- How to salvage it when it happens.
The best solution was The Absorber Towel just damp with water. If done right away it worked great and didn't mar or dull the shine of the card stock. (an Absorber is like a chamois that you use on your car.
- I didn't want any stray embossing powder. After some experimenting I discovered you will have almost perfect release every time if you take the powder out of your tool (I use the EK Success Powder Tool) and I brushed it on with a soft brush (I used the Perfect Pearls brush.). The difference was amazing it left no streaks on the page and was much faster. I've heard some people use cornstarch or baby powder. After the embossing powder cooled I gave it a quick wipe with an old glitter brush I had, but a Swiffer Magic Clean Up Cloths (which I cut into small pieces) also works.
- When securing enamel dots when the card will be shipped, I put a small dot of glue in the center and when I push it down the adhesive on the back holds it in place. But that dot of Multi Matte Medium keeps it in place.
- These cards weighed .9 ounces and were delivered just fine with 1 stamp.
OMG I think this is the world's longest blog post. I really have to work on making videos. If your still with me, you are either bored or as crazy as I am for writing this. But seriously I hope the added detail helps you. I wish more bloggers would put tips and what they learned from the project. Now I have to go spend several hours finding all of the product links and getting everything uploaded.
I hope you and your family had a wonderful holiday season for what ever special holiday you celebrate!
I know that some of these products are out of stock. But you can always sign up to be notified when they become available at Simon Says Stamp. Or you can do a google search to locate them elsewhere.
* Indicates I am an Affiliate